

Over the summer, I spent quite a bit of time thinking about Winter Camping. I know it might seem off but I am always looking ahead to what I want to do next and making sure I have sufficiently planned all of that out so it is not just a possibility but a reality!

As many of you that have followed my winter adventures know, last year, I built my very own tipi from scratch and spent a few nights testing it out in various settings. Now that I have gained more knowledge on camping in the winter, I feel I am ready to expand my horizons a bit more and not only car camp with the tipi, but take it out on some backcountry adventures!

In order to do this, however, I am going to need a sled and with some advice from my friend Kyra from Kyra On the Go , I purchased a toboggan to use to pull my gear. With a few easy modifications, and a harness lent to my by my good friend, Jamie, the owner of Outdoors Oriented, the sled would be ready to use.


Originally, we planned to use eye hooks, but when we got to Home Depot, we had a better idea to use small carbiners we found on sale. LOL. But after arriving back to my dads, we realized the lip on the rim of the sled was too big and would not entertain that idea.

My dad found some wire he had in his workshop and we drilled two holes, one inch apart, down both sides of the sled. We made 5 double holes on each side, then made one on the back and 5 on the front.

The wire was put in each hole to form a loop at the top to attach a rope or bungee cord that would hold all of my gear in/on the sled securely. I was pretty sure the more, the better. I did not have to use all the loops for bungees, but it would be good to have as many as possible, just in case. In the front, I put two loops to attach the harness with carabiners, and, two extra loops in case somehow the first two broke. The loop we put in the front centre spot would be used to attach gear just like the one on the centre back.


The wires were twisted underneath the lip and tucked away. This took very little time and because I’d already had a harness, we didn’t have to tinker with that part of the sled. Easy Peasy!


I took it outside and attached the harness to check it out and it seemed to work fine, so far. With gear and snow it would be a different story, but I had neither here, so that test would have to wait until later.


Next we needed to revise the tipi poles. This was a project that took some time to think of and nail down a procedure. I was still really nervous about what I had decided to do, but the alternative was to go out and spend $700 or more on another hot tent and that seemed really silly to me considering, I already had one.


The first step was to measure all 9 poles at exactly half their size, 5 feet. Then cut them in half. This is the part that was freaking me out as I knew there was no turning back once this was done. I was very worried that what we would do would not work at all and leave me with no tipi, but, with everything there is risk and sometimes, you just have to see what happens and go for it!
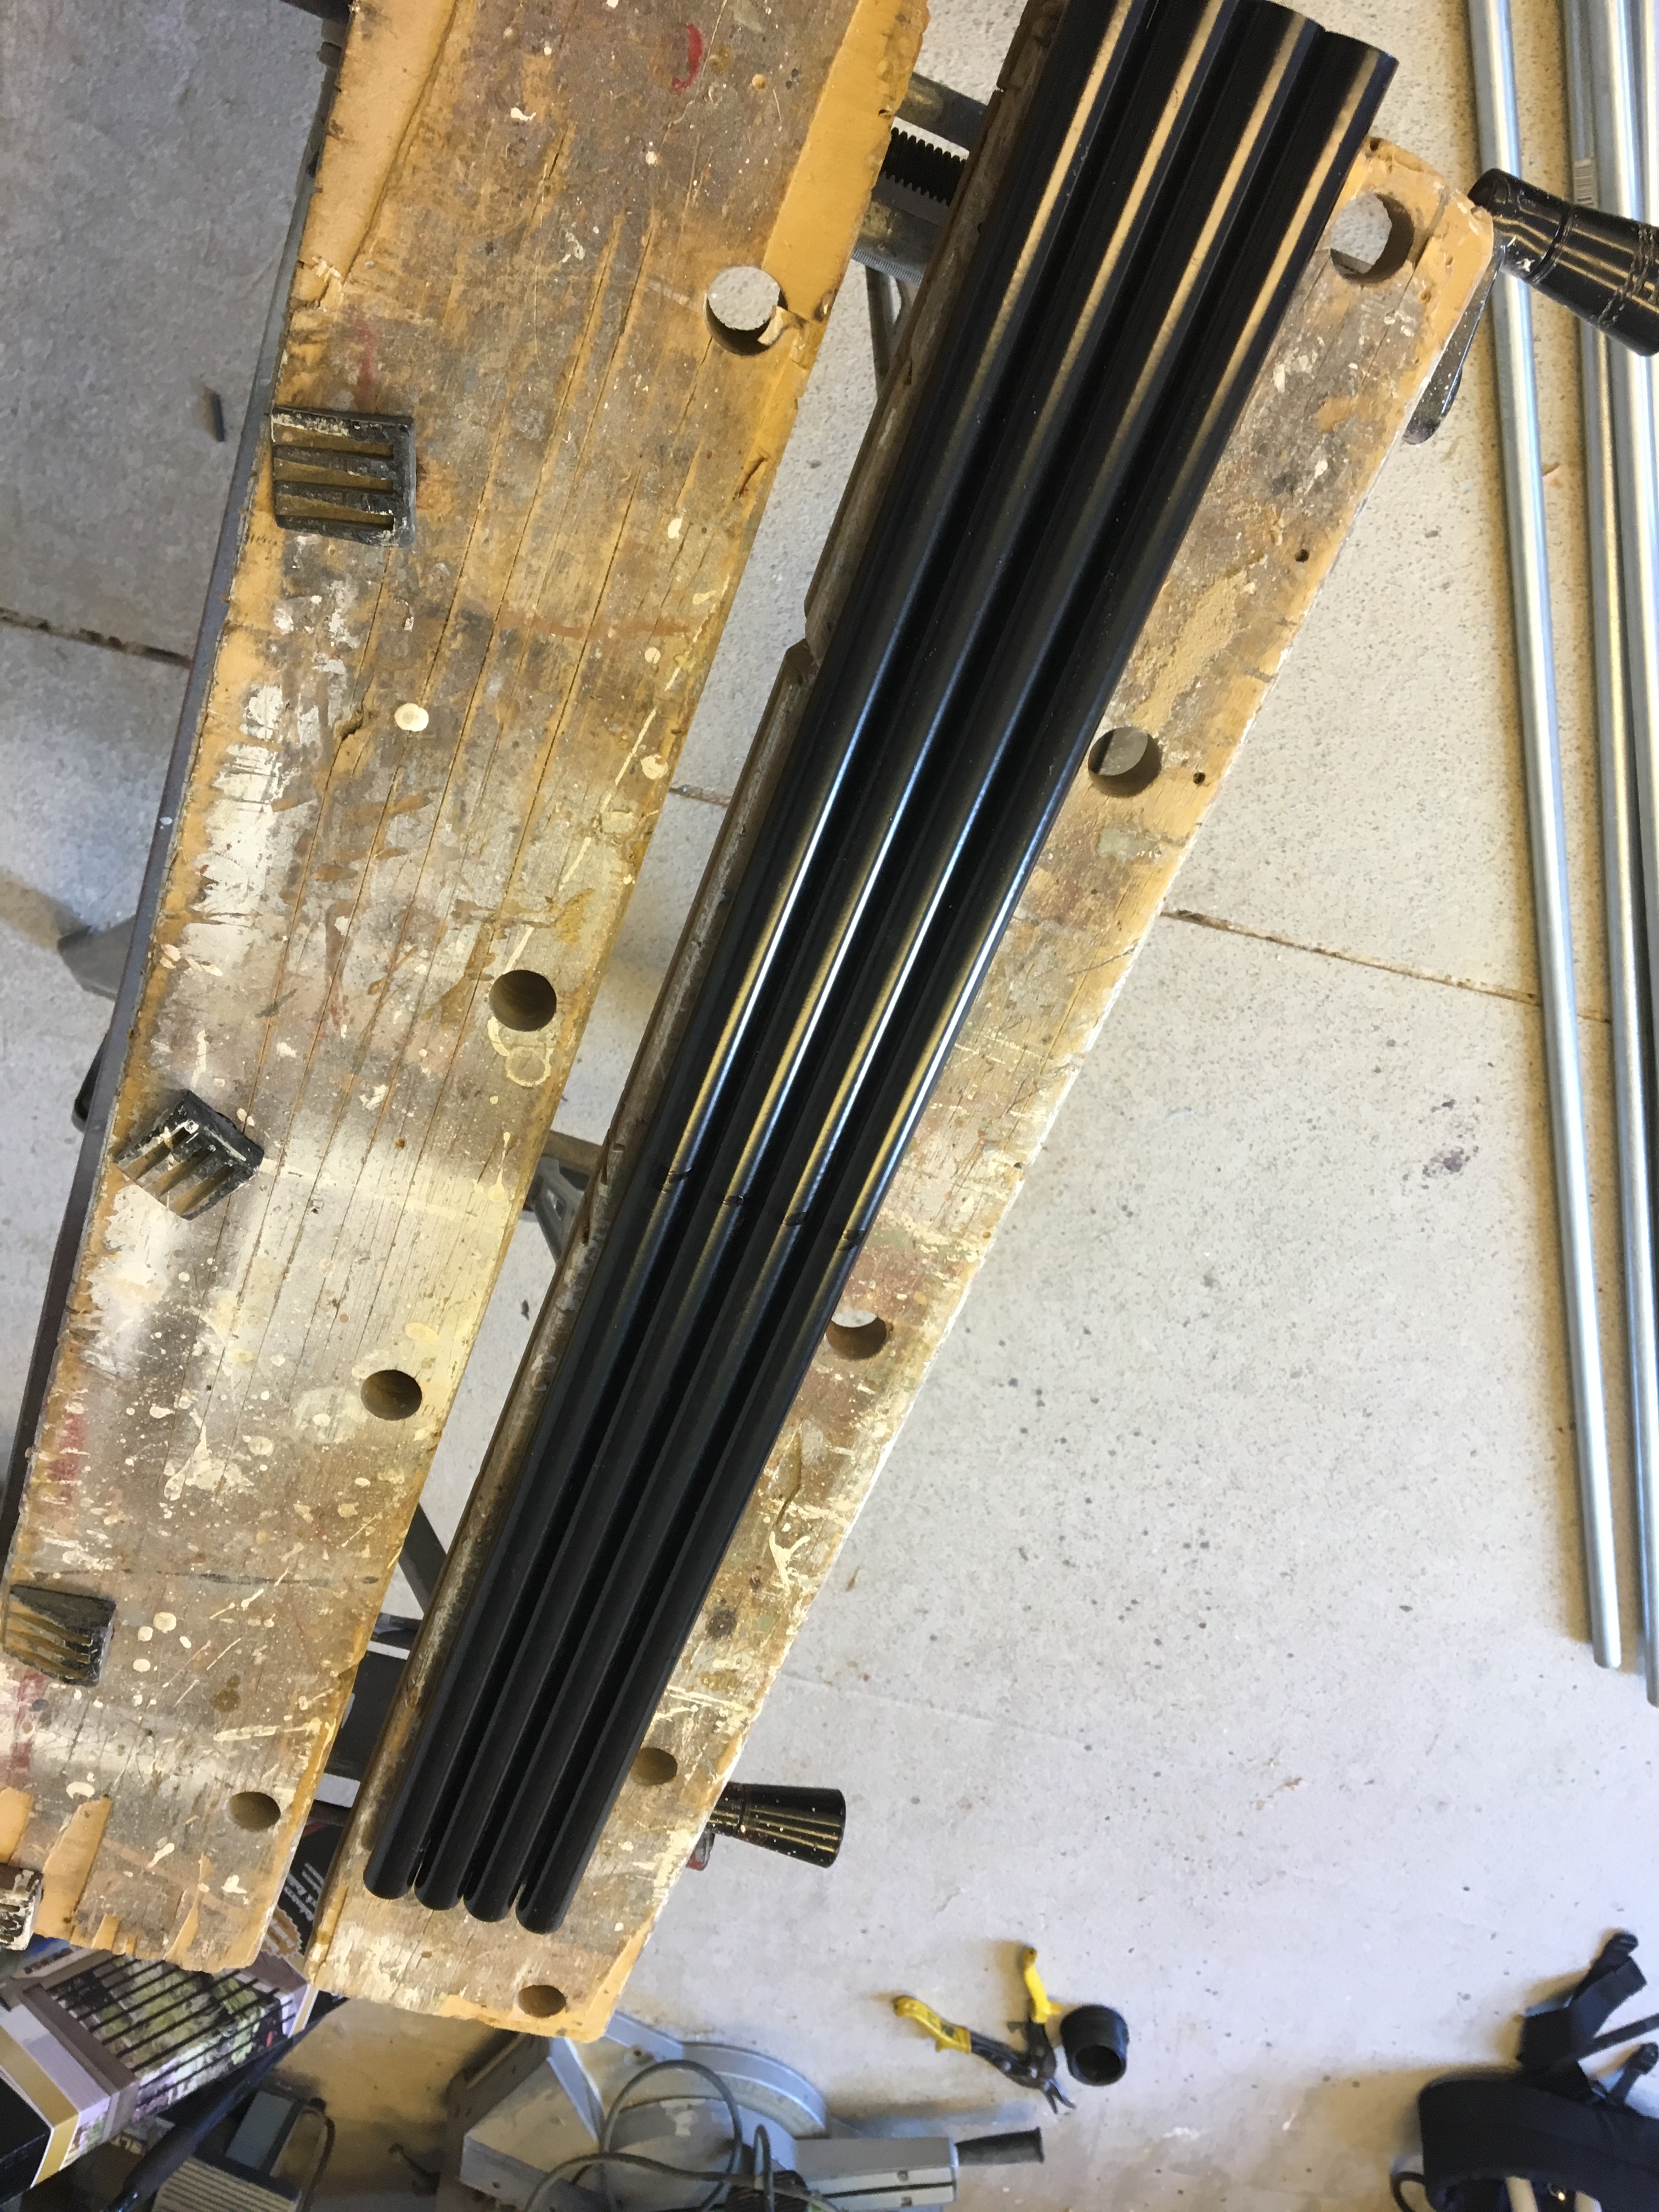
Even though we’d gone to Home Depot and purchased a 10′ pole exactly like the ones I used for the original creation, but 1/4″ larger to use as a sleeve, my dad had found some in his workshop that were a better fit. The plan was to cut the ten foot tipi poles in half, then put a slightly smaller width pole inside the bottom halves that would stick out about 6-7 inches and the top half of the pole would then slide over that insert to join the two halves and once again make a ten foot pole.

Once the poles were cut into 5′ lengths, the bottom section of the pole had the smaller pole insert put into it with 6.5″ sticking out as above.


The poles were then clamped together with vice grips to keep them both from moving. A small dent was put in where the bolt would go through the larger pole to avoid slipping off the drill press. (it is very difficult to drill a hole into a round pipe, let alone two pipes inserted in each other and this machine my dad has, made this a lot easier to accomplish).


Once the hole was drilled, a screw and nut were placed through both pipes to ensure they would not move in any way. The end of the bolt was then snapped off and hit with a hammer to ensure the nut would not fall off and the poles would remain bound forever.


This process was repeated until all 9 poles were done. After we finished them, my dad and I set up the tipi frame to make sure that everything worked the same as before the poles were cut, and it pretty much did. It will be a bit harder to take the tipi down as when we leaned the poles back over to drop the unit to the ground some of the bottoms fell out but while they were standing, there was not much difference at all in the poles from before they were cut.

The only issue discovered in the renovations today was that the sled, which I believe was advertised as 6 feet, was actually 5′ and with the inserts the half of the poles are 5 feet 6.5 inches making them a bit too long still for the sled. The solution I’ve come up with for that is to make a bag.

I headed to Fabricland a few weeks later and picked up some vinyl that has a crack rating ? of -40. LOL. As some of us know, in winter, plastic cracks fairly easily so I had to make sure the bag wouldn’t break and leave me stuck out in the backcountry with loose poles. No one wants that! LOL


I originally decided to make two bags and lay them on top of each other. I didn’t think all the poles would fit in one bag and I thought it would be too heavy to carry just one. I laid out the fabric, put the poles inside each flap, to make sure the bag would be wide enough, drew a line with a sharpie and cut it.


Next I attached the velcro to seal the poles in the bag at the top, and also attached 3 handles. These were not to carry the bag, but to strap it down onto the sled with bungees.


Once that was all done, I used the sewing machine to make a seam along the bottom and along the one side, as it was folded over, I only needed one long seem which made it much easier and also more durable. I did sew it twice, however, to make it extra strong!

After I finished the first bag, I realized I could get all the poles into it and had a bit of room to spare. Guess there wasn’t any point in making two bags after all? I could carry them together just fine and I actually thought it would be easier, in the end, to just have one bag, instead of two.


I packed up the sled with the wood stove and the tipi and had lots of room to spare for gear. I laid the bag on top just to see how it would fit and it seemed to work pretty good! Once the sled had the rest of my gear on it, the bag should sit nicely on top and even work to hold all the other items down. Guess I will find out soon?
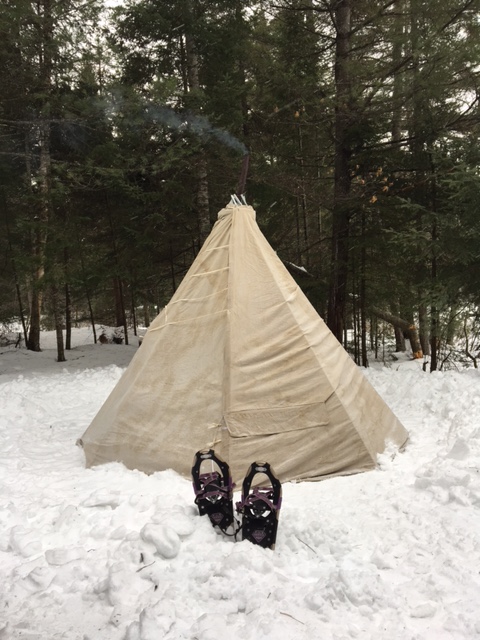
I took the tipi to Mew Lake just after Christmas to test it out car camping once with the pole revision before taking it out on the sled. I spent my days scouting winter sites in the nearby backcountry. The poles being cut in half was only noticed slightly when setting up and tearing down and had no bearing on the structure of the tipi, or it’s performance at all. WHEW!!! Now that that has been tested… it’s time to take it out in the backcountry and see if it all works out how I’m hoping it will. I’m planning a trip some time in the next few weeks, so please stay tuned and wish me luck! LOL
If you have any questions, issues, or just want to say hello, please leave a comment and I will get back to you as soon as I am able to! BIG HUGE THANKS To my dad for all his help with these renovations!!!! I couldn’t have done it without you dad, thank you!
Thanks for checking out my post!
Happy Camping!
Camper Christina
Excellent work!!!
If you use “wing-nuts” instead of regular nuts, it will make connecting/disconnecting the poles easier 😉
The other thing you could do if your dad has a welder is place a small metal piece on the end of the bolt so you can hold it while tightening the pieces together… avoids having to bring wrenches.
Hey Jim! Thanks so much! Actually there is no wing nuts, no disconnecting/connecting of the poles. The top half slides over the black inserts permanently attached to the bottom halves and then the weight of them holds them on top of each other!!! No wrenches required. 🙂 Thanks so much for commenting and for checking out the post!! Let me know if you have any other suggestions? Love creative minds!!!
I’m sure this was on over site setting up the sled/harness assembly without snow, but cross the shafts between harness and sled for better control.
HI Mike! Definitely not an oversight! I did not know this. Someone just mentioned that on Facebook. Thanks so much! I appreciate the advice greatly!!!! 🙂
See Christina, setting up with pictures in summer was not a waste of time. Spontaneous is great but the best trips are the ones when prep is done.
Agreed 100% . I love prep! 🙂
Here is another thought…. you have fully capped the top of the poles right? If not then water could get inside and freeze the pieces together. If it is a fairly tight fit to start with, it wouldn’t take much water to create an ice lock.
Interesting thought! Thank you again! 🙂 very good point!
Should find out if anyone, while hot tent car camping, has used charcoal for their heat stove’s fuel source…. I know with my smoker I can have it run for over 8 hours on one charcoal load. If you got the same performance, you could get a full nights sleep and still have heat in the morning.
You would need to check out how well your stove would hold/distribute the heat but….
Hmm sounds interesting for sure! I had picked up some of those 6 hour burning logs at CT and someone told me they are hard on the pipes but I am going to bring a few on my next trip. I will look into the charcoal. I’ve not heard of people using it so either we are smarter or there is a reason? I’m hoping its the first one! hahaha ! Thank you again! cc
Did some more digging…. since charcoal burns hotter it can burn through some of the cheaper hot tent stoves. A grate system can solve the issue but not a lot of stoves have them.
So… you may be better off just making sure you have some good, dry hardwood to burn (it burns a lot slower than softwood, but I’m sure you know that).
Awe, thanks so much Jim for doing some digging for me! I bought a few of the 3 hour logs yesterday and will bring a few into the backcountry with me, just in case. I appreciate your help so much! Have an awesome day!
[…] had renovated my tipi last month for the backcountry and wanted to test it out once car camping to ensure there were no […]
[…] At the start of November, I began thinking about winter a bit and knew that if I wanted to do some solo backcountry trips, I was either cold tenting, which I’m not a huge fan of, or I needed a lighter hot tent. From then on, the plans began to swirl around in my head and I had lots of ideas about how to make another tent, this time, lighter and better suited to take into the woods on my toboggan. […]
[…] had borrowed a sewing machine last year from a friend at work to renovate the tipi as mine had been in storage. I still had it somewhere in the house so I checked for it and located […]